1. Search for the official container of your application;
2. Choose a database and user name and generate a password;
3. Write or copy a compose.yaml (or Dockerfile) to deploy:
4. Make sure your compose file is:
5. Configure the NGINX reverse proxy with your domain. Create the root location to proxy the requests to the app container on the correct port;
6. Run the containers and check if the SSL will be issued. With a bit luck, you won't have to deal with build or run errors.
1. Run Speedia OS with docker, podman or your preferred container management platform:
docker run --rm --name myapp-container \
  --env 'PRIMARY_VHOST=myapp.net' \
  -p 8080:80 -p 8443:443 -p 1618:1618 \
  -it docker.io/speedianet/os:latest
2. Create your account and deploy an application:
docker exec -it myapp-container /bin/bash
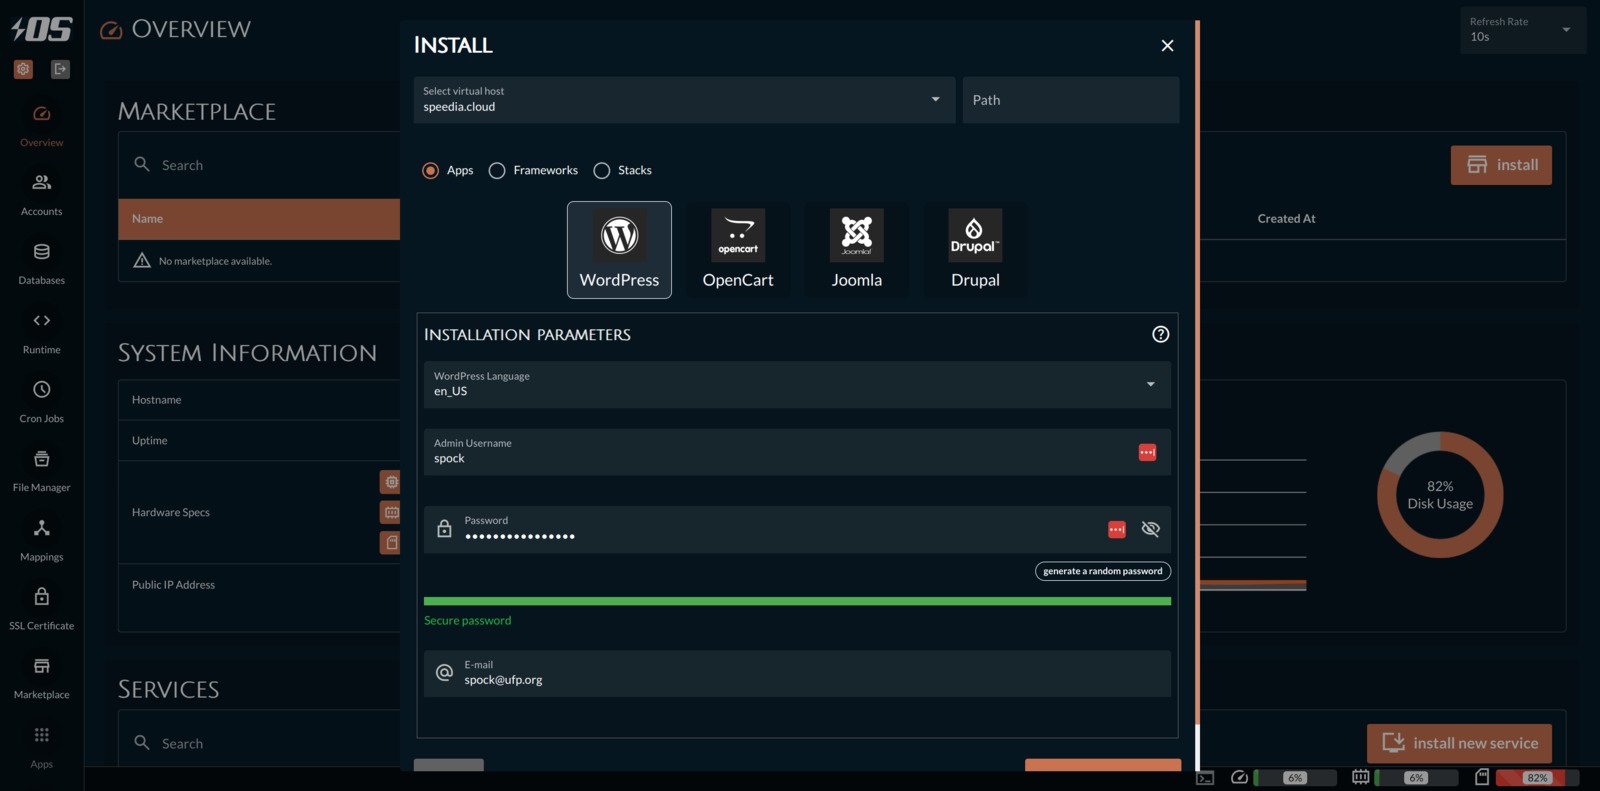
os account create -u admin -p admin
os mktplace install -s wp -n myapp.net \
-f 'adminUsername:admin' \
-f 'adminPassword:abc123' \
-f 'adminMailAddress:user@myapp.net'You can also use the dash to deploy with a single click:
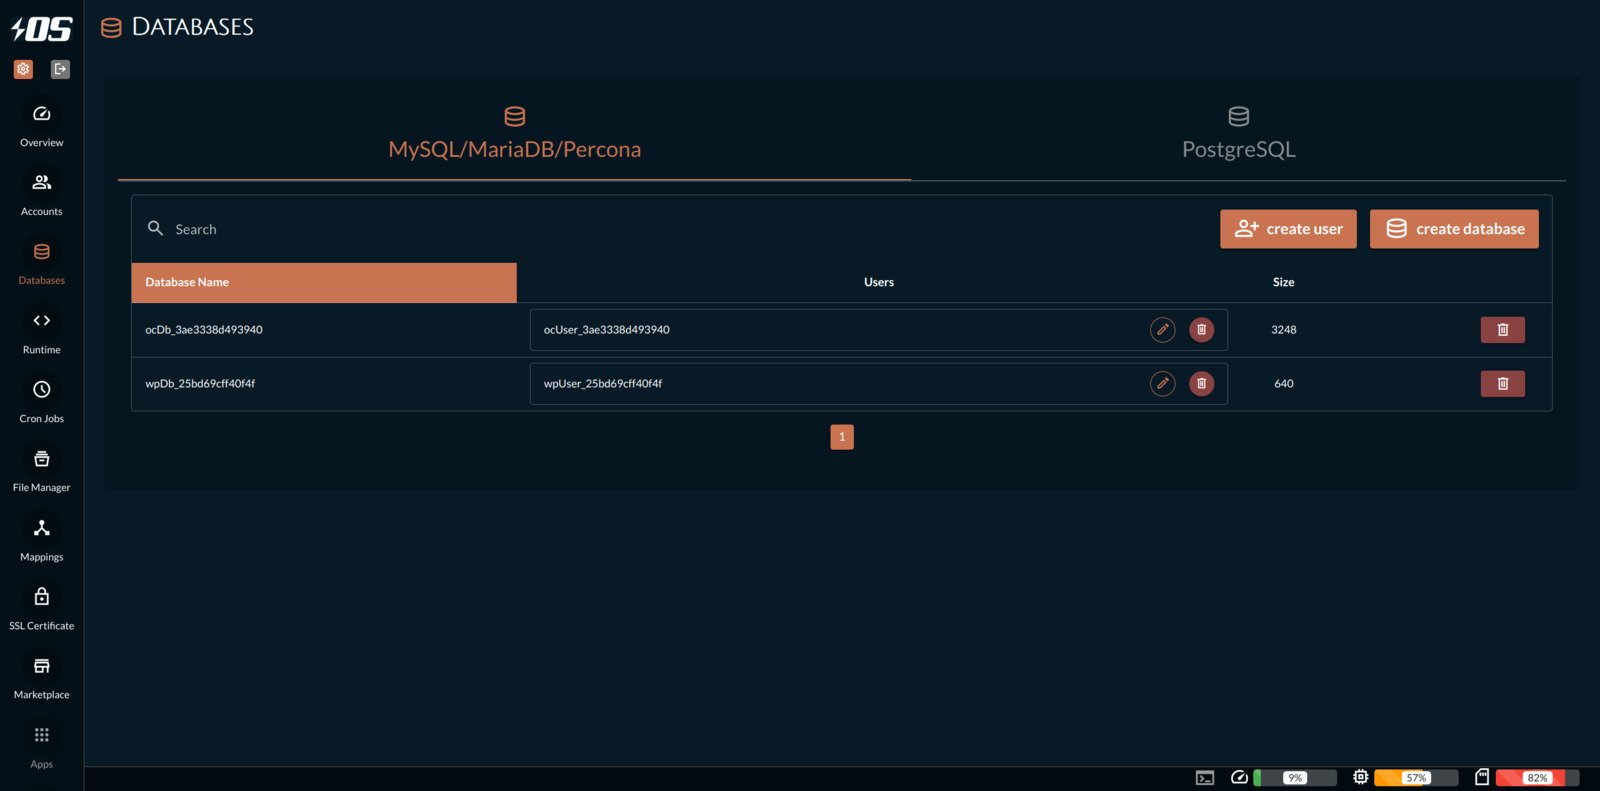
1. Copy the database root credentials to the clipboard;
2. Edit the compose.yaml (or Dockerfile) to deploy a database management interface container, such as Adminer, phpMyAdmin, pgAdmin, RedisInsight etc;
3. Make sure the new container is linked to the database, the port is not being used and pass the secrets as env variables if possible or necessary;
4. Configure a virtual host or sub-directory on your reverse proxy to proxy the requests to the database management interface container;
5. Limit these interfaces to your specific IP address and guarantee you always access via HTTPS;
6. Access the interface and paste the database credentials if needed to login.
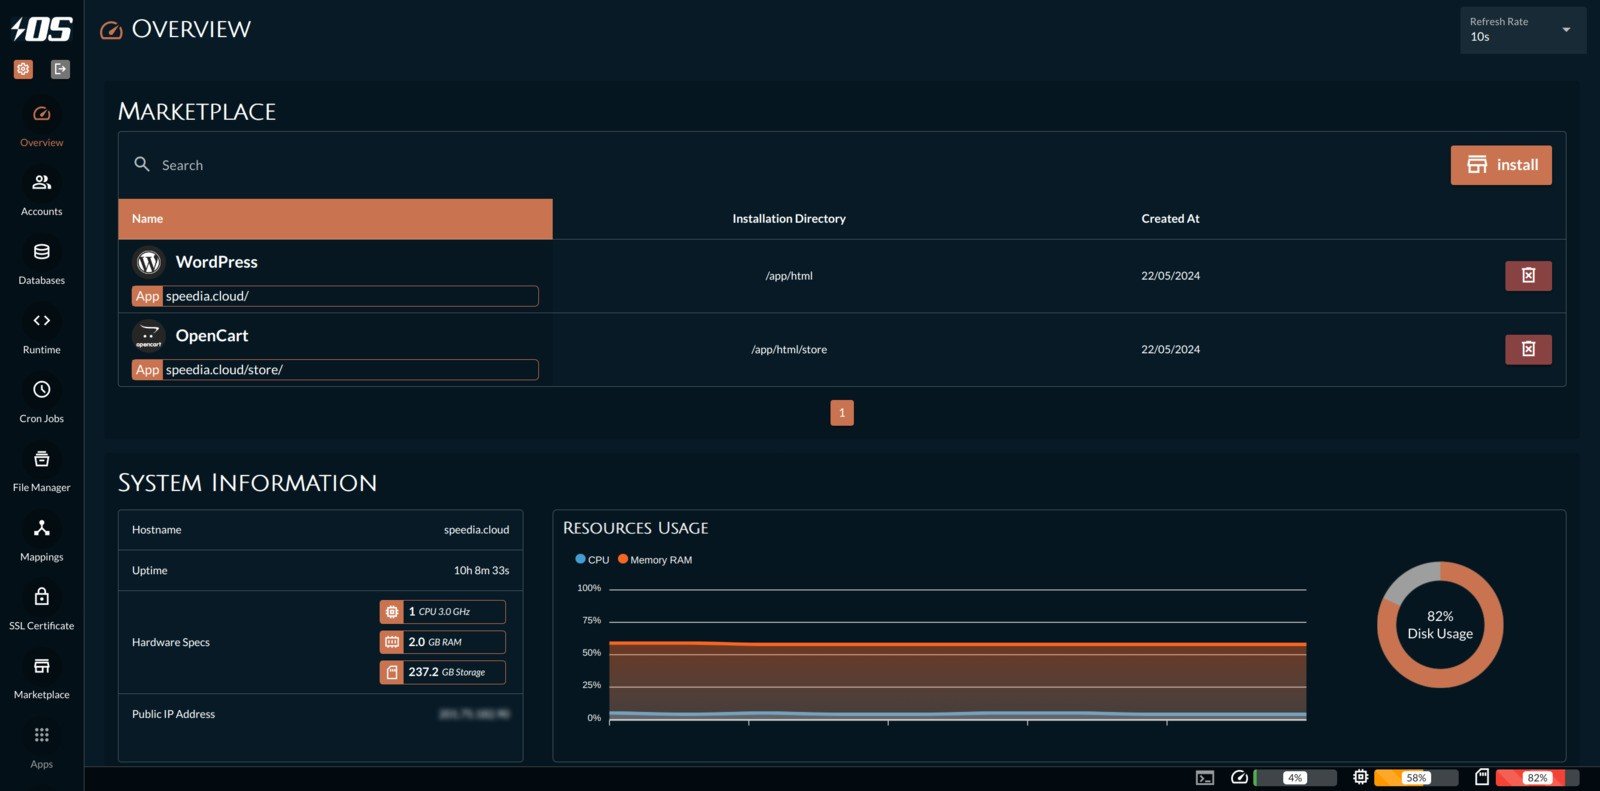
1. Access the dashboard and go to the Databases page:
There isn't a straightforward way to manage the files inside a container, but there are a few options:
1. Use an IDE, such as Visual Studio with the Docker extension, and browse it through the sidebar. You won't be able to visualize the file metadata, such as ownership, permissions etc, but you will be able to access its content. To upload, compress and decompress files, you'll need to use the Terminal/SSH;
2. Use a SFTP client, such as FileZilla. That will allow you to list files with metadata, download, upload and modify files, but you won't be able to compress or decompress file;
3. Use a Terminal to connect to "/bin/bash" on the container - assuming it has Bash installed - and navigate via commands such as you would do in a SSH connection;
4. As long as you have a GUI on the host machine or VNC, mount a volume to the container (preferably before deploying) so you can manage the files used by the container on the host interface;
5. Deploy a container of a file manager application such as FileRun and create shared volumes between the containers so you can manage the files visually. Make sure you don't expose that application to the public, always access via HTTPS and use strong credentials.
1. Access the dashboard and go to the File Manager page:

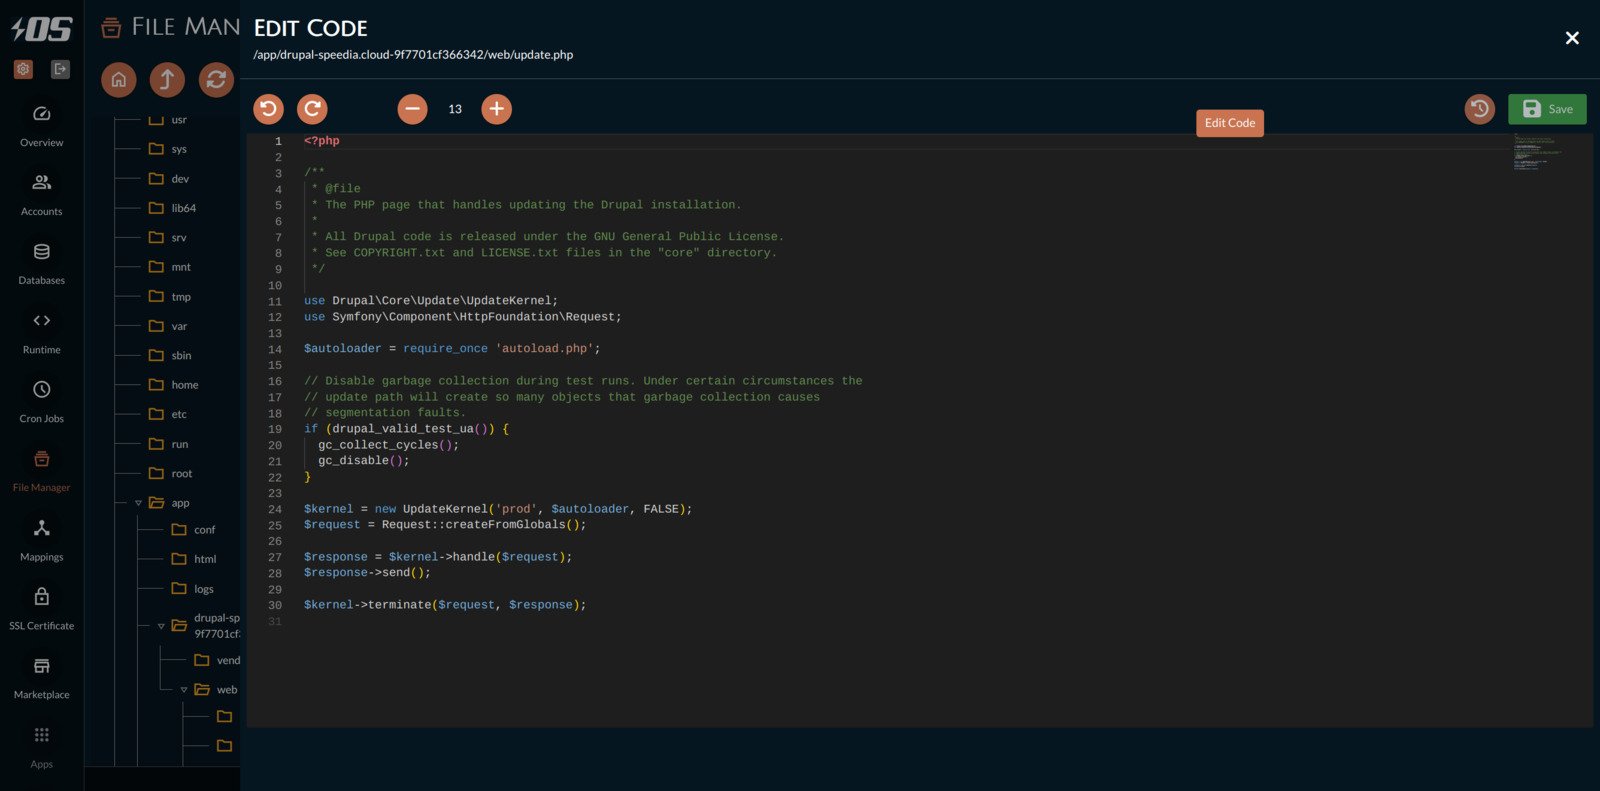
The File Manager allows you to fully manage files, including editing them with the same file editor used by Visual Studio.
Manage services inside the container depends on the state and composition of the container in question.
If you container is already running AND does have a process management such as Supervisord, Systemd, PM2 etc:
If the container is already running AND does not have a process management, unfortunately you'll have to rebuild the container and copy all data out of the container.
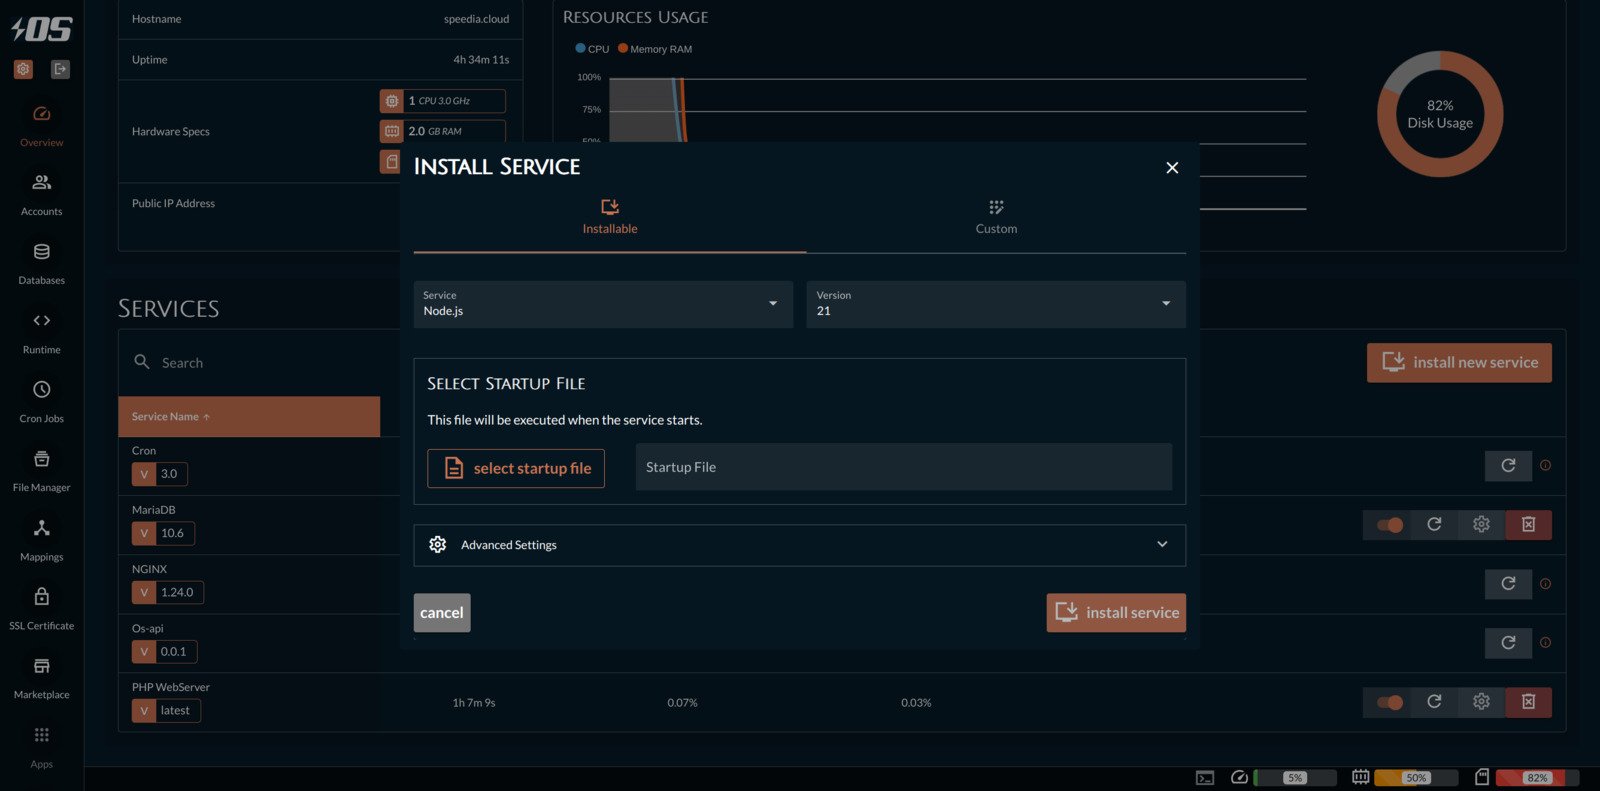
If the container was not yet deployed AND it does not have a process management:
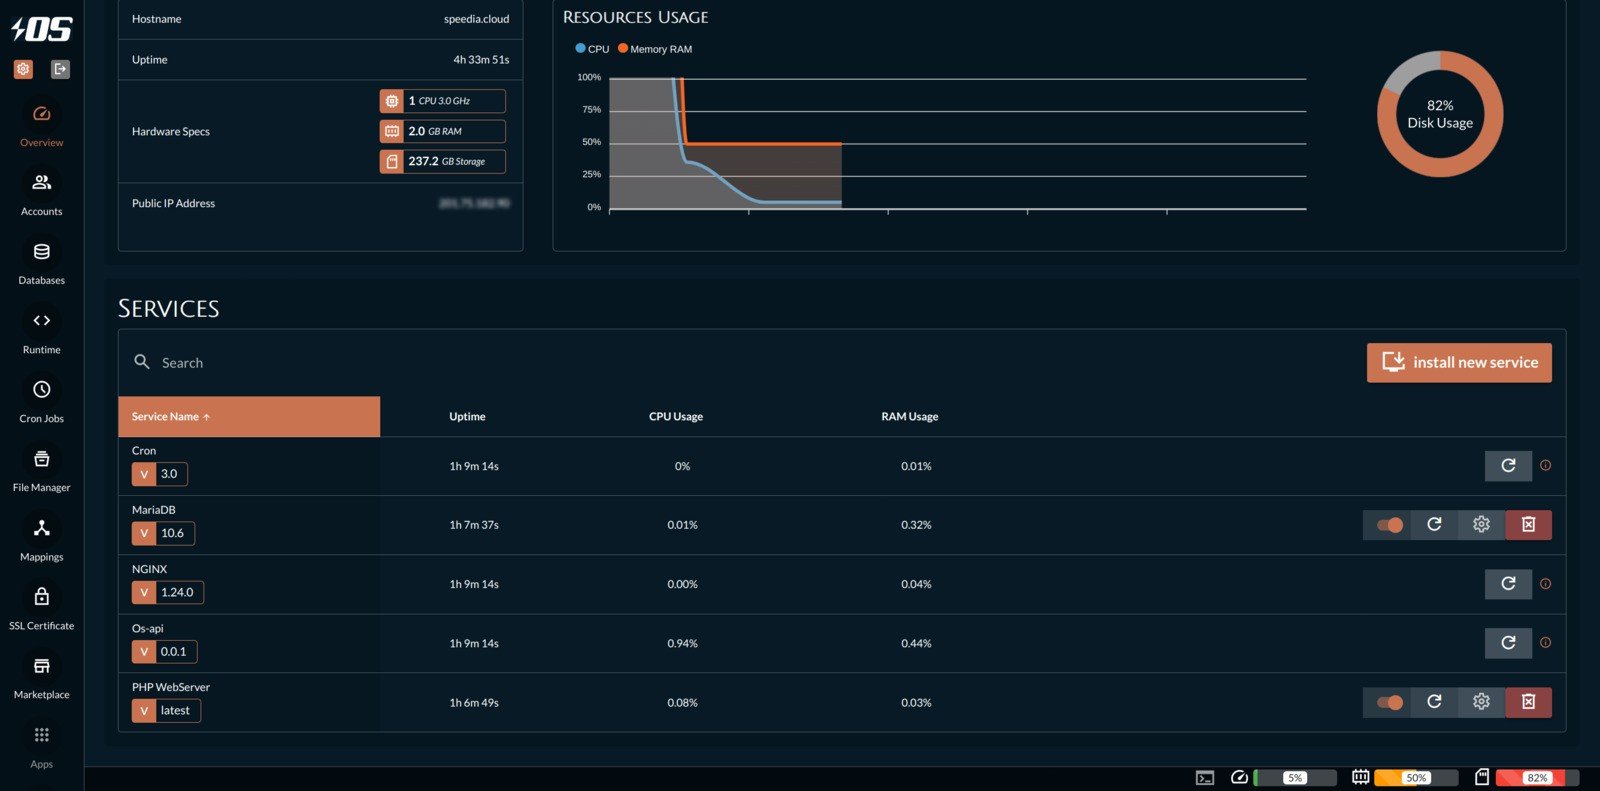
1. Access the dashboard and go to the Services section:
1. Create a docker/podman network via CLI;
2. Edit your compose.yaml to include all the containers into the new network;
3. Replace your reverse proxy container with NGINX Proxy Manager or the alternative UI for your preferred reverse proxy on the compose.yaml file;
4. Restart the deployments;
5. Login into the admin UI and update the default login credentials;
6. Check the compose.yaml file to get the container names and ports so you can create a proxy, redirect, streams or 404 host.
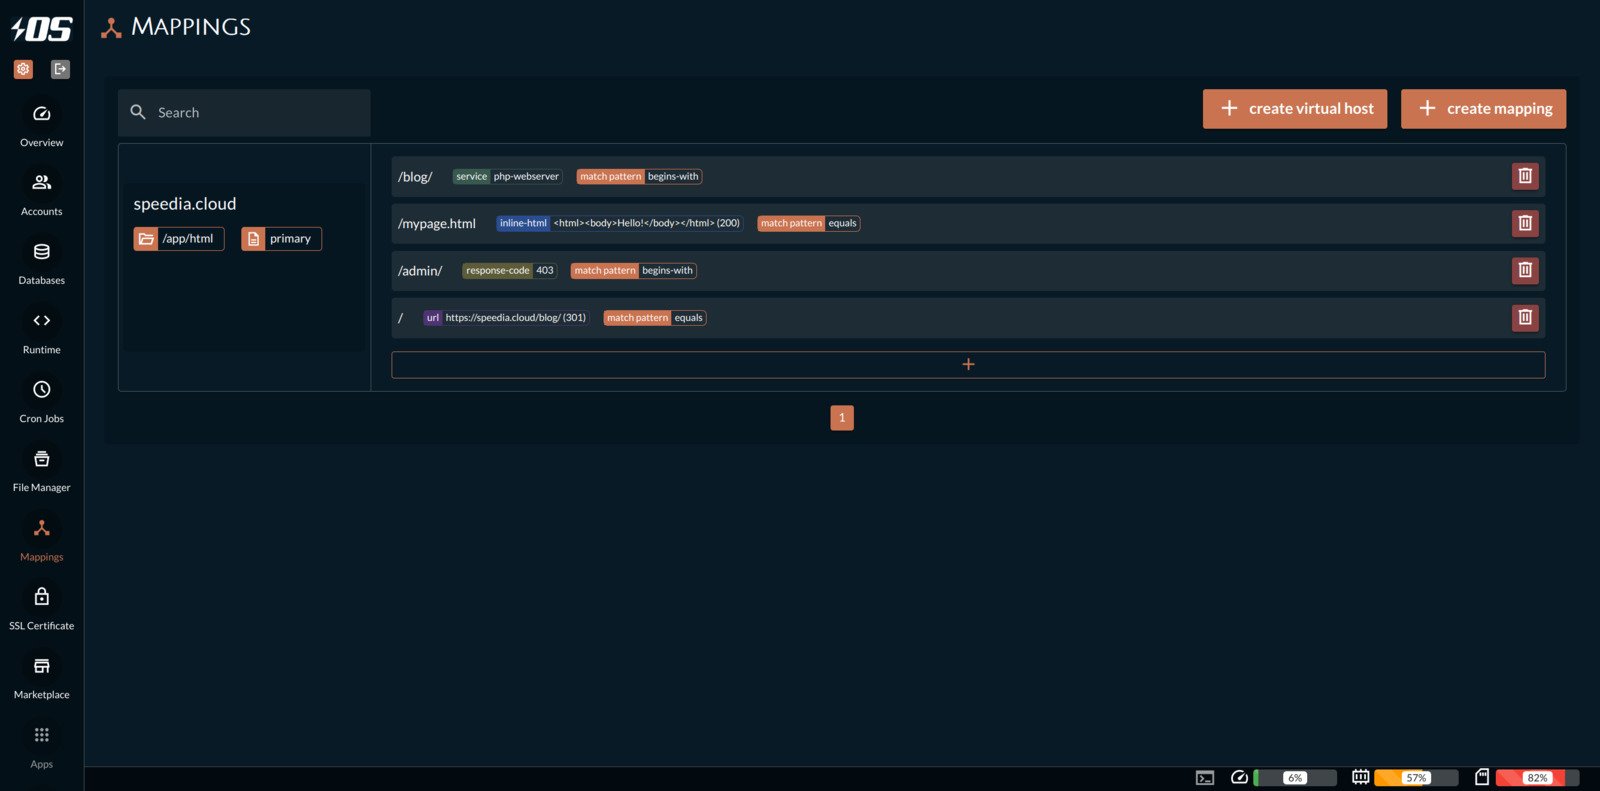
If you installed the application via the Marketplace, the necessary mappings were already created for you! :)
If you want to create, edit or delete a mapping, access the dashboard and go to the Mappings page:
There is not way to visually edit your cron jobs on containers. In fact, most containers won't have a cron daemon.
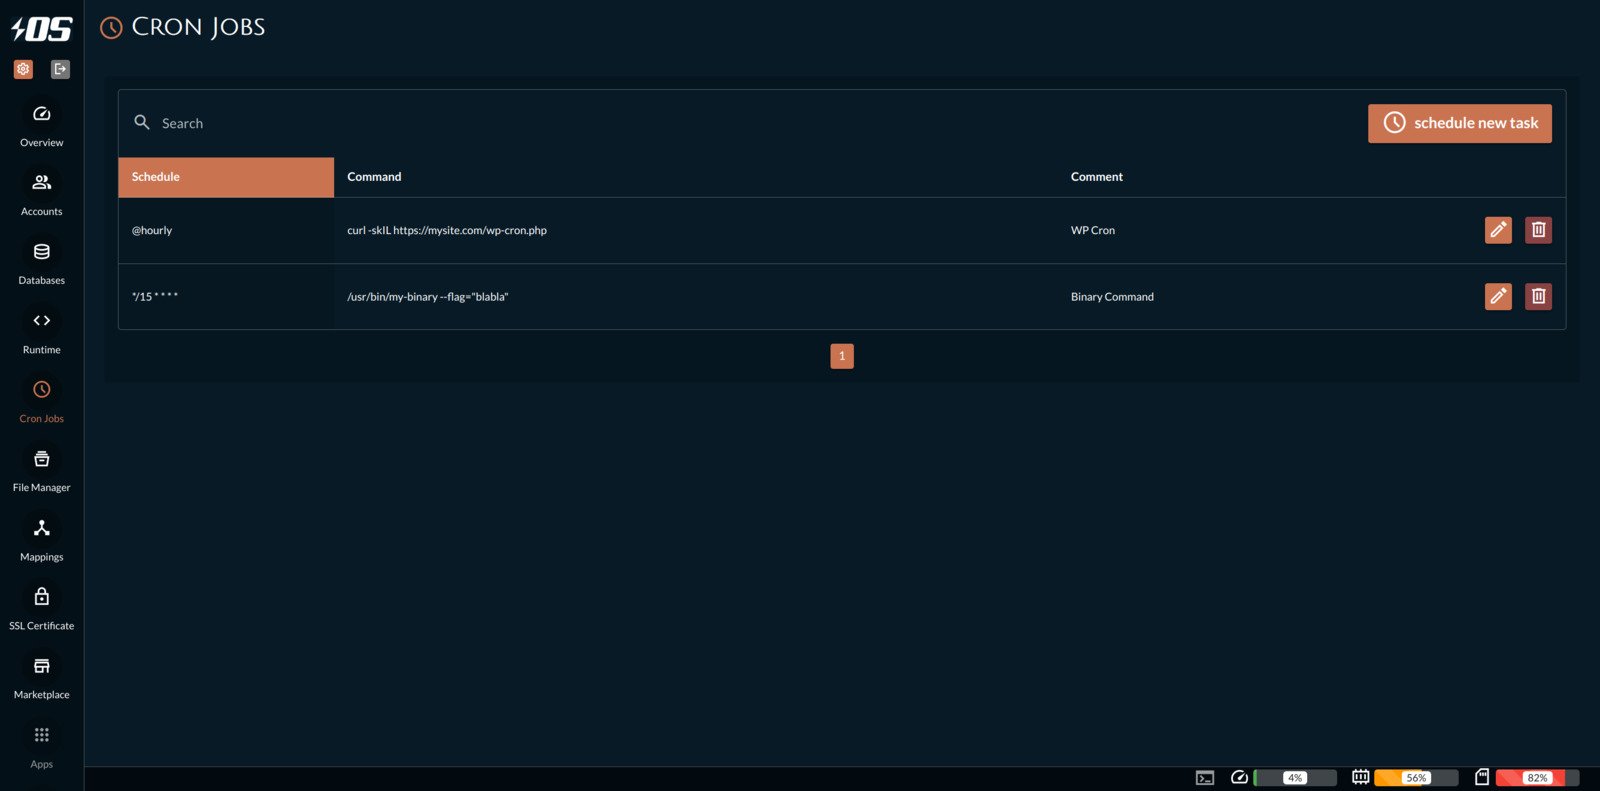
However, if your container does have a process management such as Supervisord, Systemd, PM2 etc:
https://os.demo.speedia.net:1618/_/
User: demo
Password: abc123